600mL Drainage Bottle
CONTRAINDICATIONS AND RESTRICTIONS ON USE:
Do not use the drainage system in direct contact with brain, liver, spleen and other parenchymal organs. Insertion of the drainage system in spongy bone wounds may result in excessive blood loss.
SIDE EFFECTS: None if used properly
WARNINGS:
• Re-use of single-use devices creates a potential risk to patient or user. It may lead to contamination and/or impairment of functional capability. Contamination and/ or limited functionality of the device may lead to injury, illness or death of the patient.
• If the vacuum indicator on the bottle has unfolded, do not continue to use the wound drainage system as a high vacuum system.
• Use aseptic techniques.
• Place wound drainage correctly.
• Ensure that wound seal is air-tight.
• Use adequate number of wound drains to ensure that wound or body cavity is drained properly.
• Secure wound drain adequately to avoid disconnection or dislocation of the system.
DIRECTIONS:
CAUTION:
To prevent valve damage, DO NOT USE needles or blunt cannula to access the swabable valve. Only use standard Luer connection devices; non-standard syringes or connectors can damage the swabable valve. Do NOT OVER-TIGHTEN connections. DO NOT USE any instrument to tighten connections.
1. Use sterile techniques to remove the 600mL drainage bottle from inside the packaging.
2. Remove the protective cap off the swabable valve.
3. Using a sterile alcohol wipe, swab the surface of the valve. Let it air dry.
4. Carefully connect the connection set to the valve by pushing the Luer connection straight into the swabable valve using a clockwise, twisting motion. DO NOT try to insert at an angle or try to pry open the slit in the valve.
5. Connect the inserted drain and open the clamp at the grey connector.
6. The 600mL Evacuated Drainage Bottle is now ready for use.
7. Change the bottle if the vacuum indicator is pulled apart.
8. Twist counterclockwise to disconnect. The swabable valve completely closes after each use.
9. Dispose of used device per facility protocol for biocontaminated materials.
1,000mL Evacuated Drainage Bottle
CONTRAINDICATIONS AND RESTRICTIONS ON USE:
Do not use the drainage system in direct contact with brain, liver, spleen and other parenchymal organs. Insertion of the drainage system in spongy bone wounds may result in excessive blood loss.
SIDE EFFECTS:
None if used properly.
WARNINGS:
• Check the type and quantity of wound secretion.
• When changing the suction bottle, close the wound drain from the patient to prevent backflow of secretion.
• Check that the Luer-Lock connection between Evacuated Drainage Bottle and connection set is securely connected.
DIRECTIONS:
CAUTION:
To prevent valve damage, DO NOT USE needles or blunt cannula to access the swabable valve. Only use standard Luer connection devices; non-standard syringes or connectors can damage the swabable valve. Do NOT OVER-TIGHTEN connections. DO NOT USE any instrument to tighten connections. Use aseptic techniques.
1. Remove the protective cap off the swabable valve.
2. Using a sterile alcohol wipe, swab the surface of the valve. Let it air dry.
3. Carefully connect the connection set to the valve by pushing the Luer connection straight into the swabable valve using a clockwise, twisting motion. DO NOT try to insert at an angle or try to pry open the slit in the valve.
4. Connect the inserted drain and open the clamp at the grey connector.
5. The 1,000mL Evacuated Drainage Bottle is now ready for use.
6. Change the bottle if the vacuum indicator is pulled apart.
7. Twist counterclockwise to disconnect. The swabable valve completely closes after each use.
8. Dispose of used device per facility protocol for biocontaminated materials.
WARNINGS:
• Re-use of single-use devices creates a potential risk to patient or user. It may lead to contamination and/or impairment of functional capability. Contamination and or limited functionality of the device may lead to injury, illness or death of the patient.
• If the vacuum indicator on the bottle has unfolded, do not continue to use the Evacuated Drainage Bottle as a high vacuum system.
• Place wound drainage correctly.
• Ensure that wound seal is air-tight.
• Use adequate number of wound drains to ensure that wound or body cavity is drained properly.
• Secure wound drain adequately to avoid disconnection or dislocation of the system.
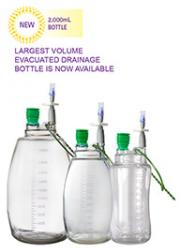
2,000mL Evacuated Drainage Bottle
CONTRAINDICATIONS AND RESTRICTIONS ON USE:
Do not use the drainage system in direct contact with brain, liver, spleen and other parenchymal organs. Insertion of the drainage system in spongy bone wounds may result in excessive blood loss.
SIDE EFFECTS: None if used properly.
WARNINGS:
• Re-use of single-use devices creates a potential risk to patient or user. It may lead to contamination and/or impairment of functional capability. Contamination and/ or limited functionality of the device may lead to injury, illness or death of the patient.
• If the vacuum indicator on the bottle has unfolded, do not continue to use the wound drainage system as a high vacuum system.
• Place wound drainage correctly.
• Ensure that wound seal is air-tight.
• Use adequate number of wound drains to ensure that wound or body cavity is drained properly.
• Secure wound drain adequately to avoid disconnection or dislocation of the system.
DIRECTIONS:
CAUTION: To prevent valve damage, DO NOT USE needles or blunt cannula to access the swabable valve. Only use standard Luer connection devices; non-standard syringes or connectors can damage the swabable valve. Do NOT OVER-TIGHTEN connections. DO NOT USE any instrument to tighten connections.
1. Remove the protective cap off the swabable valve.
2. Using a sterile alcohol wipe, swab the surface of the valve. Let it air dry.
3. Carefully connect the connection set to the valve by pushing the Luer connection straight into the swabable valve using a clockwise, twisting motion. DO NOT try to insert at an angle or try to pry open the slit in the valve.
4. Connect the inserted drain and open the clamp at the grey connector.
5. The 2,000mL Evacuated Drainage Bottle is now ready for use.
6. Change the bottle if the vacuum indicator is pulled apart.
7. Twist counterclockwise to disconnect. The swabable valve completely closes after each use.
8. Dispose of used device per facility protocol for biocontaminated materials.